Quick Start
Introduction
KittenBot’s AgileWhisker Keyboard is a customizable mechanical keyboard that empowers you to unlock new possibilities for PC interactions using DeviceScript. It can be connected to various Jacdac electronic modules, enabling you to build your own unique application modes based on your creativity.
Why AgileWhisker?
We believe the best application of DeviceScript is for PC peripherals. Have you ever imagined being able to control everything around you with the keyboard in front of your computer?
With the AgileWhisker Keyboard, the keyboard and its connected Jacdac functional modules will be further empowered by the Agent desktop software, transforming into dynamic tools that adapt to each user's unique needs and preferences, and is extended with the integration of Jacdac modules.
We aim to allow software engineers unfamiliar with hardware development to quickly master the skills of writing interactive effects to meet their personal needs and interests.
Features & Specifications
- Microcontroller: RP2040
- Programmable RGB LEDs on each key
- Jacdac protocol electronic module expansion
- Scripting Language: DeviceScript
- Open-source Agent app provided for continuous expansion of advanced software services for the keyboard
- USB Type-C for firmware flashing and upgrades
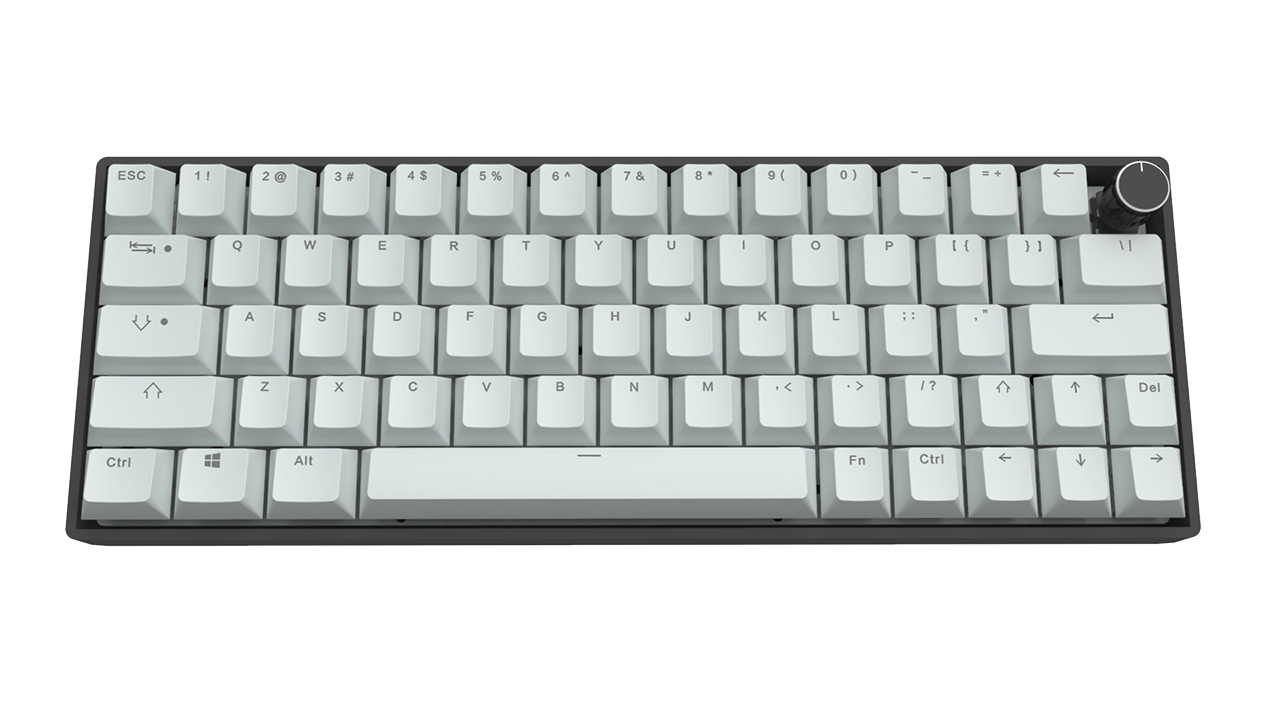
- Elite60 Keyboard
-
Dimensions: 293x110x38 mm
-
Number of keys: 64
-
Number of knobs: 1
-
Expandable Jacdac Modules how many and what connector
-
Keypad
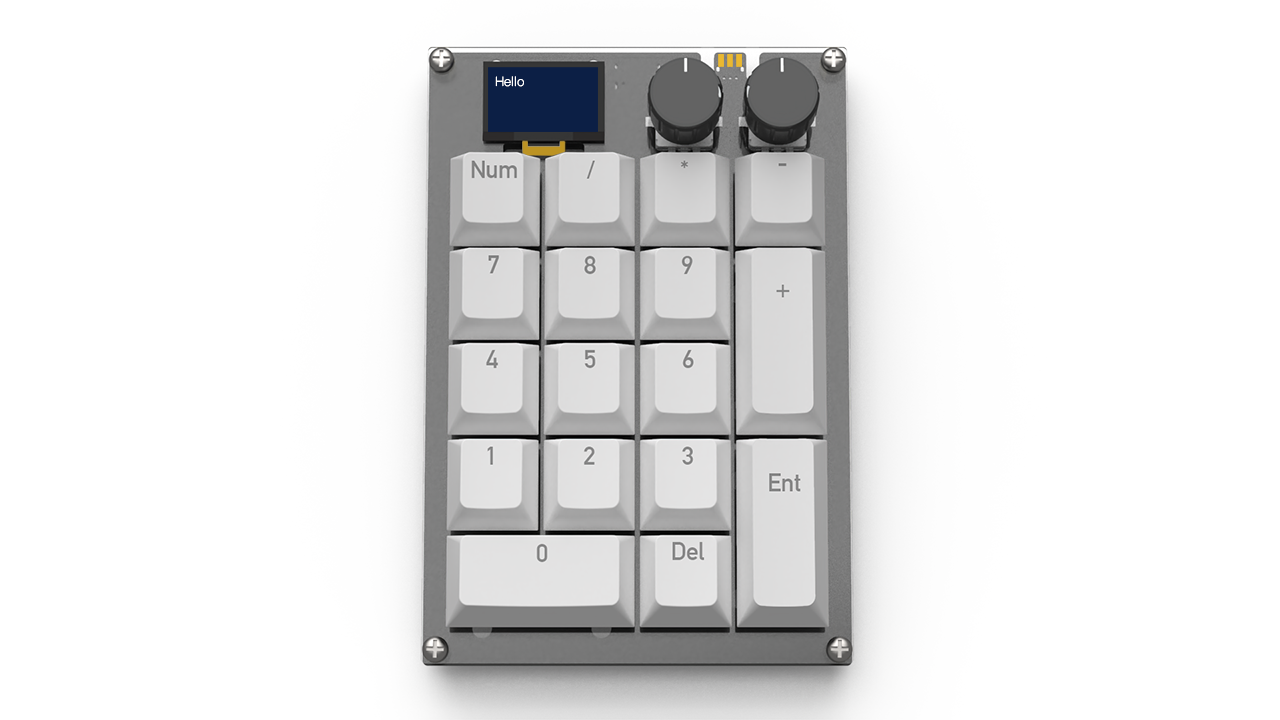
- Dimensions: 83x123x38 mm
- Number of keys: 17
- Number of knobs: 2
- Expandable Jacdac Modules how many and what connector
- 128x64 px OLED
Getting Started with VSCode and DeviceScript
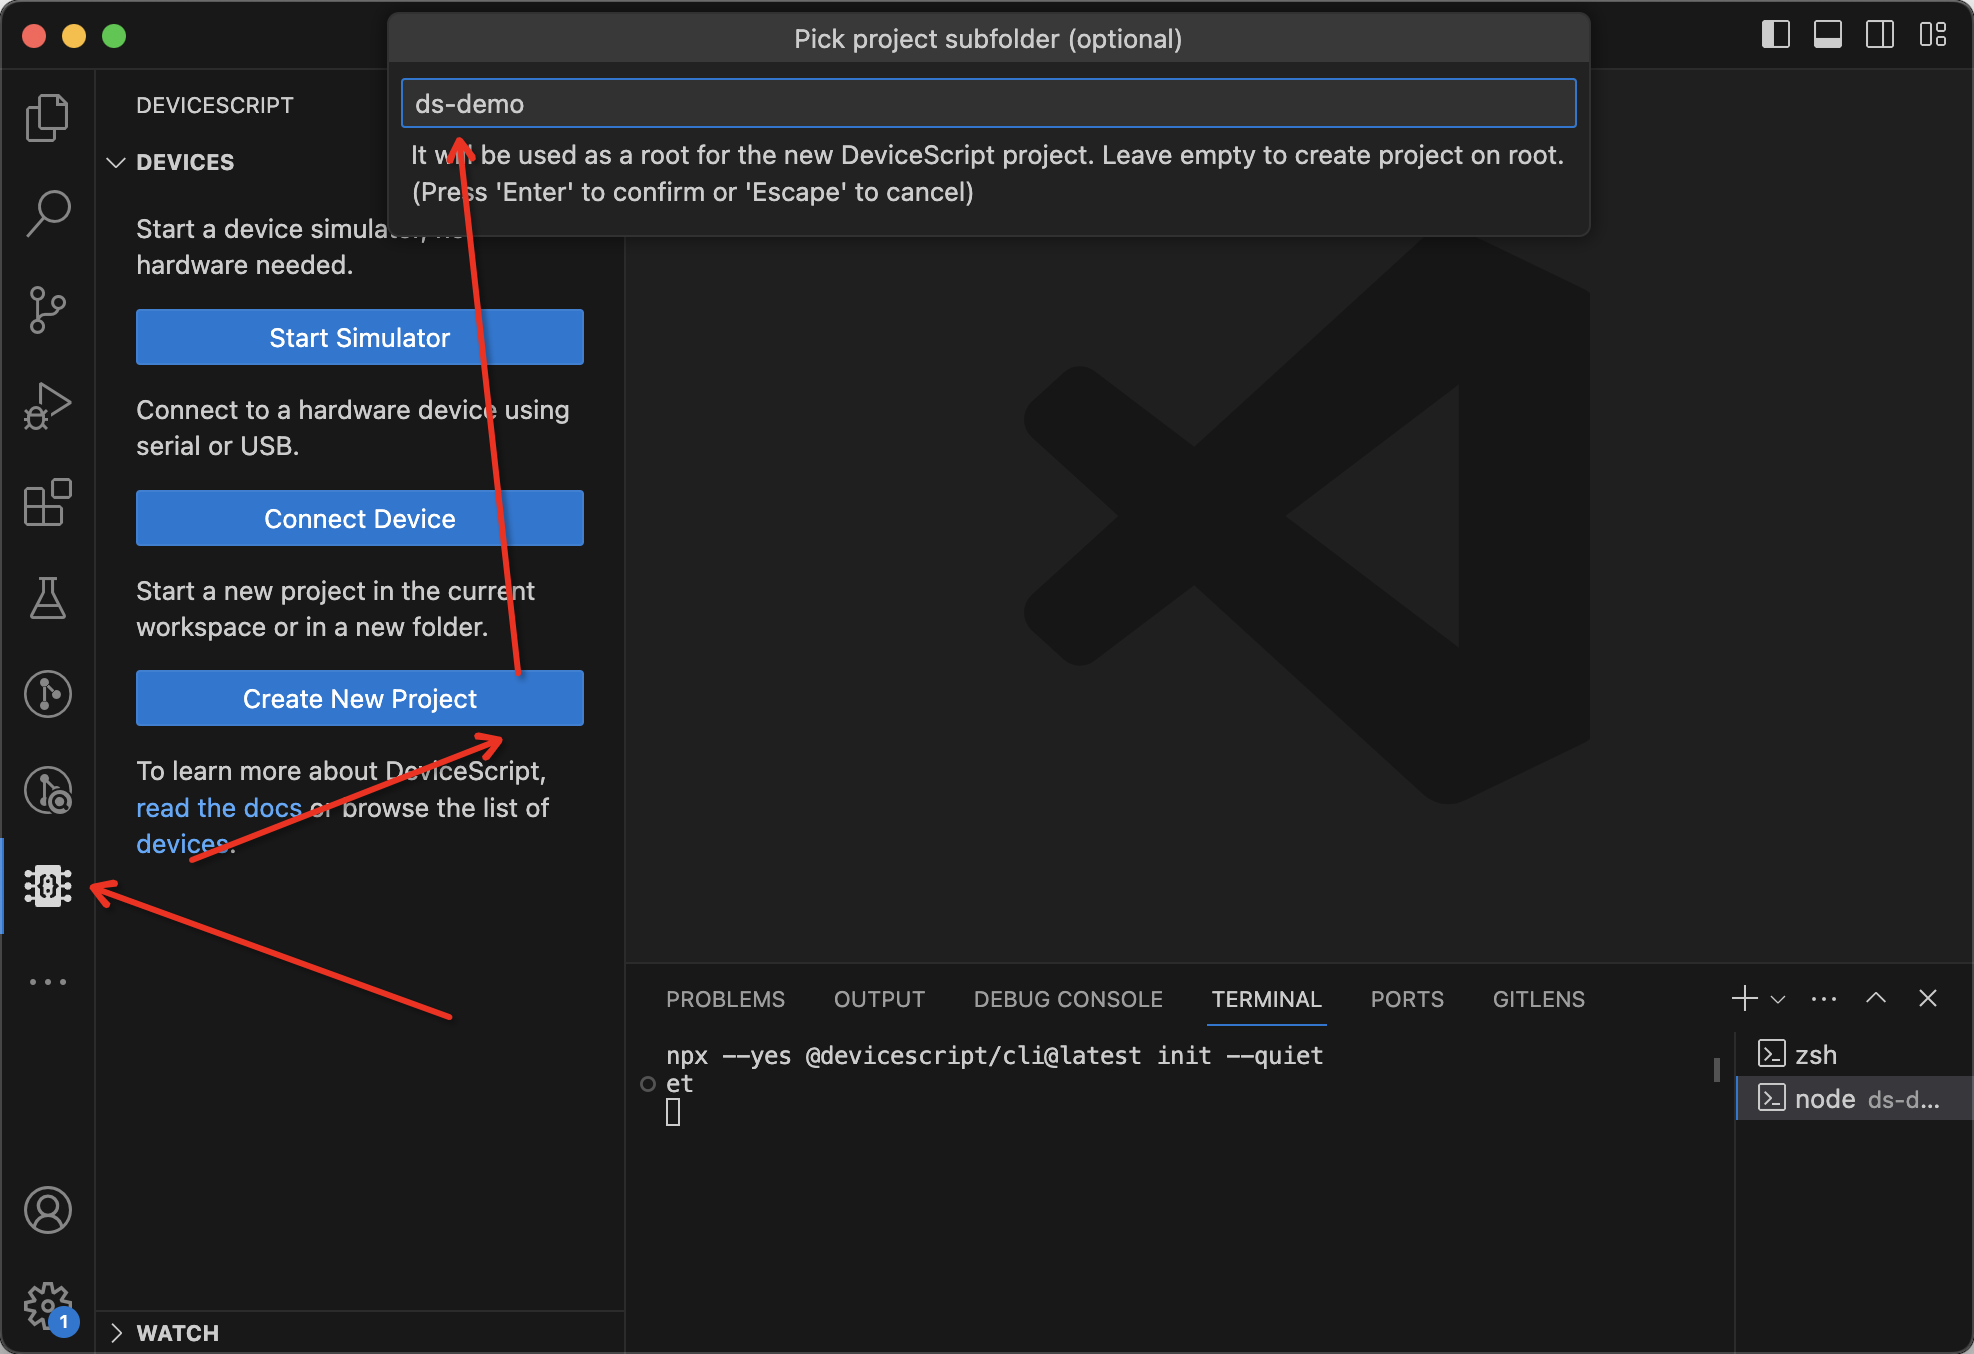
- First, we will need to install the necessary DeviceScript extension in VSCode.

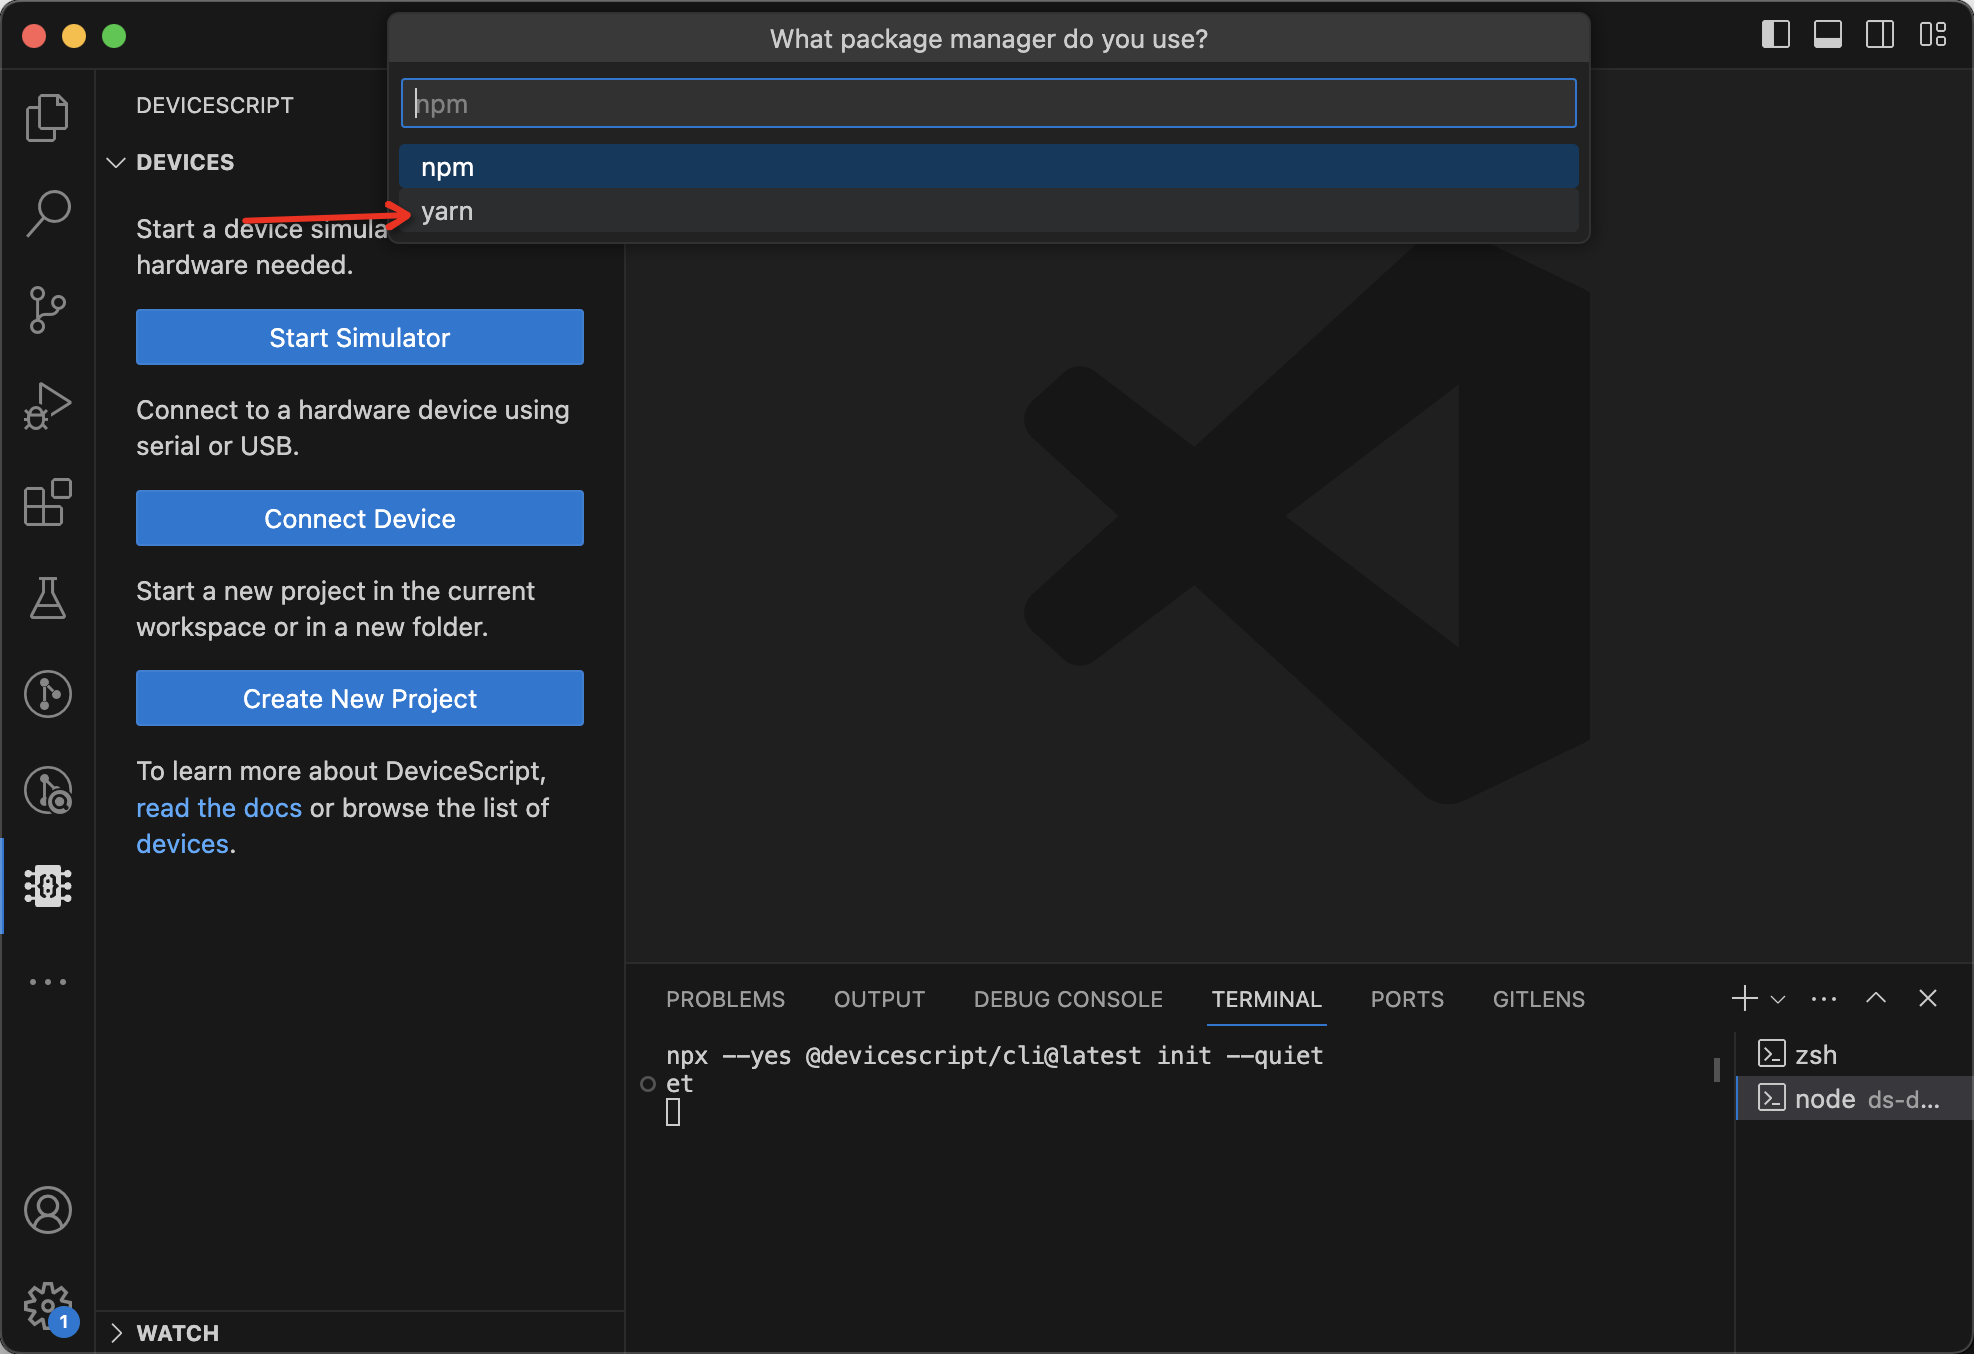
- Create a new project and open it (or you can also start with our demo project).
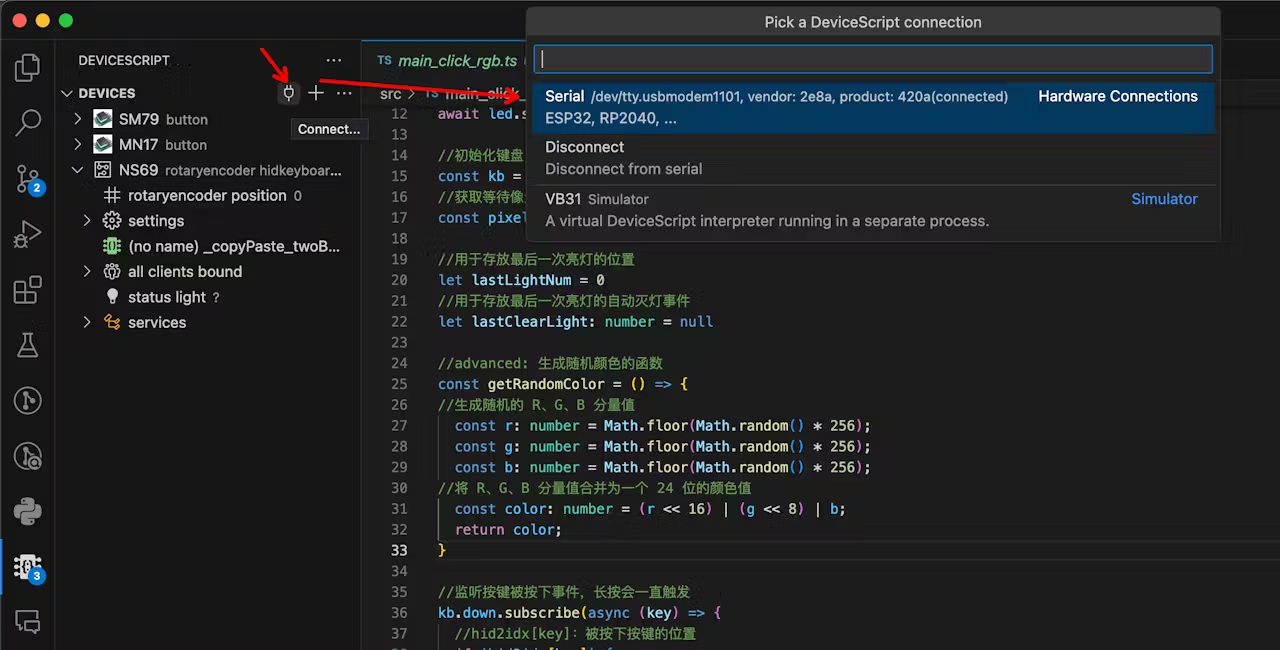
- After connecting the keyboard using USB, connect the device in the project.
Keyboard Sample
The flowing colorful lights of a mechanical keyboard are vibrant, but their display modes are limited. With TypeScript editing, we can completely customize a set of flashing combinations that we like. In the following example, we will create a simple RGB that lights up randomly following a key press.
- In our project, write the program in the .ts file (you can give the this file a more intuitive name). First, import the core libraries we need to use.
import { KeyboardClient, LedStripLightType, LedVariant, gpio } from "@devicescript/core";
import { startLed } from "@devicescript/drivers";
import { hid2idx } from "./utils/ledmap";

//初始化键盘内led灯
const led = await startLed({
    length: 13*5,
    columns: 5,
    variant: LedVariant.Strip,
    hwConfig: { type: LedStripLightType.WS2812B_GRB, pin: gpio(7) },
})
await led.showAll(0) //0为灭灯状态 设置全灭灯

//初始化键盘
const kb = new KeyboardClient()
//获取等待像素
const pixels = await led.buffer()

//用于存放最后一次亮灯的位置
let lastLightNum = 0
//用于存放最后一次亮灯的自动灭灯事件
let lastClearLight: number = null
- get the keys position through the HidKeyboard class in the core library.
//监听按键被按下事件,长按会一直触发
kb.down.subscribe(async (key) => {
  //hid2idx[key]:被按下按键的位置
  if (hid2idx[key]) {
    //code
  }
}
- Complete the code.
//监听按键被按下事件,长按会一直触发
kb.down.subscribe(async (key) => {
  //hid2idx[key]:被按下按键的位置
  if (hid2idx[key]) {
      if(lastClearLight && lastLightNum===hid2idx[key]){
        //若长按按键则清除灭灯事件
        clearTimeout(lastClearLight)
      }else{
        let lastLight = hid2idx[key]
        //设置 被按下按钮 发光的颜色为红色
        pixels.setAt(hid2idx[key], 0xff0000)
        // advanced: 将发光的颜色设置为 随机颜色
        // pixels.setAt(hid2idx[key], getRandomColor())
        await led.show();
      }

      //设置自动灭灯事件
      lastClearLight =  setTimeout(async()=>{
        pixels.setAt(hid2idx[key], 0)
        await led.show();
        lastClearLight = null
      },400)
  }
})
- Run the program to test the effect.
